
Share this
by HEPACART on Sep 14, 2026
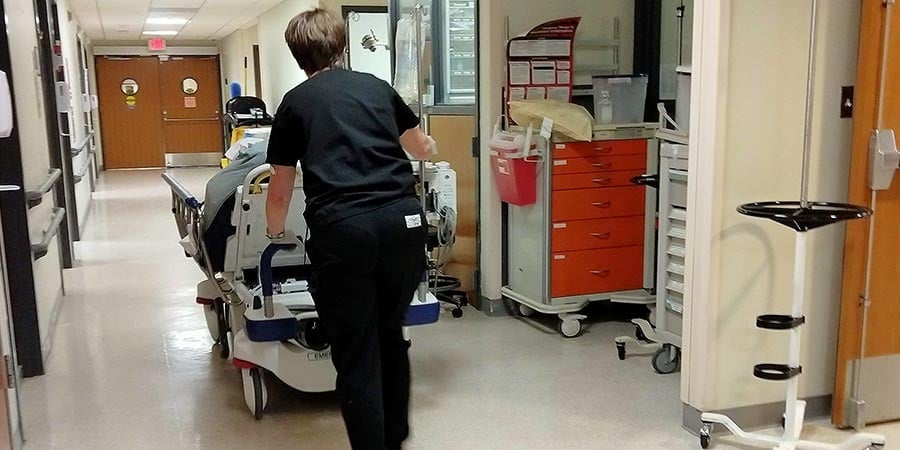
A containment cart set up correctly in ten minutes and one set up carelessly in ten minutes look identical from across the hallway. Both are unfolded. Both have a HEPA unit running. Both look, to anyone walking by, like the job is under control.
The difference only shows up later, when a barrier seam separates during a shift change, when a pressure reading was never taken, or when a new contractor sets the same cart up a completely different way three weeks into a phased project. None of that is a defect in the equipment. It's a gap in the sequence.
This walkthrough covers the setup sequence in order, from risk classification through mid-project verification, so a containment cart performs the same way regardless of who unfolds it. The goal isn't just getting containment up quickly. It's getting it up the same way every time, so the outcome stops depending on staff coordination that can't always be counted on.
Why the Sequence Matters More Than the Equipment List
Most facilities already own the right equipment. Fewer have a setup sequence that's actually written down and followed the same way by every crew. That gap is where variability enters, not in the specs of the cart itself.
A containment cart is only as reliable as the process around it. Skip a step, or perform steps out of order, and the cart can be running, sealed, and still fail to protect the space the way an infection control risk assessment (ICRA) requires. The sequence below treats setup as a chain of dependent steps rather than a checklist of tasks that can be done in whatever order feels fastest that day.
Step 1: Confirm the ICRA Class Before Touching Equipment
Setup starts before the cart leaves storage. The infection control risk assessment for the job determines the class of precaution required, and that classification determines everything downstream: barrier type, filtration requirements, and how tightly the space needs to be sealed.
Pulling a containment cart out of habit, because it's what got used on a similar job last month, skips the one step that actually tells you whether that cart is the right tool for this job. A Class III or Class IV project calls for a different level of containment than a short Class II repair, and starting setup without confirming which class applies is how equipment gets mismatched to risk before the first barrier panel goes up.
Step 2: Match the Cart to the Room, Not the Crew's Habits
Once the risk class is confirmed, the next decision is fit. A containment cart needs to match the room's dimensions, traffic patterns, and duration of use, not just whatever configuration the crew is most comfortable with.
This is where choosing the right containment system for healthcare facilities becomes a practical decision rather than a preference. A cart-based system built for mobile, spot repairs is the right fit for a short-duration job in a corridor or patient room. A larger renovation footprint may call for a repeatable barrier system instead, with the cart supporting adjacent work rather than serving as the primary containment. Matching the tool to the room before setup begins prevents the more common failure pattern: a system stretched past what it was built to handle, with seal integrity as the first thing to give.
Step 3: Position and Seal the Perimeter First
With the right equipment identified, setup itself begins with the perimeter. Every seam, seal, and connection point needs to be checked before any equipment inside the containment zone gets powered on. A visual check isn't enough. Run a hand along seams and door interfaces to confirm there's no gap where air can move freely between the contained zone and the surrounding space.
This step gets rushed more than any other, usually because it's the least visible part of the job to anyone walking by. A crew under schedule pressure can set up a cart, power on filtration, and look finished in a few minutes, while the actual perimeter seal was never verified. That gap doesn't show up until something depends on it holding.
Step 4: Establish Negative Pressure and Verify It
Once the perimeter is sealed, the containment cart's filtration and air handling components get powered on to establish negative pressure inside the zone relative to the surrounding space. This is the step that actually protects adjacent patient care areas from airborne particulates, and it's also the step most often assumed rather than confirmed.
A running unit is not the same as verified pressure. How negative air pressure actually works in healthcare construction depends on the interaction between unit sizing, exhaust path, and a sealed barrier, not on the fact that a machine is audibly on. Confirm the pressure differential with a manometer or built-in gauge before treating the space as contained, and record the reading. That reading is the difference between an assumption and a verified control.
Step 5: Set Up a Transition Zone If the Job Calls for It
Not every job needs an anteroom-style transition zone, but higher-risk classifications usually do. If the ICRA class requires one, this step happens after primary containment is sealed and verified, not before, since the transition zone depends on the pressure differential already being established correctly.
Skipping this step on jobs where it's genuinely required is one of the more common shortcuts taken under time pressure, usually justified by a job being "small enough" not to need it. That's a judgment call made by whoever happens to be on-site that day, which is exactly the kind of variability a standardized sequence is meant to remove.
Step 6: Confirm Filtration Performance Before Work Begins
Before any dust-generating work starts inside the containment zone, confirm that filtration is performing at the standard the job requires. HEPA filtration should mean 99.97 percent efficiency at 0.3 microns, and that standard should be documented for the specific unit in use, not assumed based on the acronym printed on the housing.
This step also includes a basic airflow check: confirming that air is actually moving through the filtration path as intended, rather than short-circuiting around a poorly sealed connection. Equipment that holds up under audit is equipment where this kind of verification is quick and repeatable, not something that requires specialized tools the crew doesn't already have on hand.
Step 7: Document the Setup While It Happens, Not Afterward
Documentation belongs inside the setup sequence, not after it. A pressure reading recorded at the moment it's taken, a filtration check logged as it's confirmed, and a note of who performed each step create a record that reflects what actually happened on that job, on that day.
Filling out the same form the next morning from memory produces a document that proves a form was completed. It doesn't prove the containment was correct at the time work began. That distinction matters most on the day someone reviews the record months later and has no other way to know what actually occurred.
Step 8: Build in a Mid-Project Checkpoint
For any job running longer than a single shift, the sequence isn't finished once initial setup is verified. Barriers get bumped, doors get propped for material moves, and adjacent work can shift airflow patterns nearby. A pressure reading taken on day one doesn't confirm containment on day twelve.
Schedule a mid-project check, at minimum after any change to the barrier, door access, or adjacent construction activity. This step is easy to skip because nothing visibly changed since setup, which is exactly why it needs to be scheduled rather than left to someone's judgment about whether it seems necessary that day.
What Changes When This Sequence Is Standardized
The value of following this sequence the same way every time isn't just fewer mistakes on any single job. It's that the outcome stops depending on which crew happens to be running the project.
A facility relying on one experienced technician to remember the correct order of operations has a system that works exactly as well as that technician's memory and availability. A facility that builds the sequence into training, equipment selection, and documentation has a system that performs the same way whether it's the crew from week one or a new contractor on week eight. Seven signs a dust containment strategy is failing are almost always signs of the second scenario slipping back into the first: steps getting reordered, skipped, or handled differently depending on who showed up that day.
Facilities directors and plant operations leaders feel this gap most directly, since they're the ones accountable when a project disrupts the operations happening around it. A standardized sequence reduces the number of decisions a team has to get right on the fly, which is what actually keeps a live facility running without last-minute scrambling.
Quick Reference Before the Next Setup
Before starting containment on the next job, confirm each of these in order:
- ICRA class has been confirmed for this specific job, not assumed from a prior one
- The containment cart or barrier system fits the room's actual dimensions and duration of use
- Perimeter seams and connection points have been physically checked, not just visually reviewed
- Negative pressure has been measured and recorded, not just assumed from the unit running
- A transition zone is in place if the risk class requires one
- Filtration efficiency has been confirmed against documented specifications
- Setup steps and readings are logged as they happen, not reconstructed afterward
- A mid-project verification checkpoint is scheduled, not left to discretion
Common Questions About Containment Cart Setup
Does the setup sequence change based on room size? The steps stay the same, but the specifics inside each one change. A larger room affects unit sizing and pressure calculations in step four, and may push a project toward a repeatable barrier system instead of a cart-based setup in step two. The order of operations doesn't change with scale.
How long should a proper setup actually take? That depends on room size and risk class, but a properly sequenced setup rarely takes meaningfully longer than a rushed one. Most of the time lost to containment problems happens later, during rework or an inspection finding, not during a setup that follows the correct order the first time.
What's the most commonly skipped step? Verification, in two places. Teams under schedule pressure often treat a running unit as proof of negative pressure without measuring it, and treat a completed form as proof of a step that was never confirmed in the moment.
Can this sequence be taught to a new contractor quickly? Yes, and that's part of the point. A sequence built into equipment and a written checklist transfers faster and more reliably than relying on an experienced crew member to walk a new contractor through it verbally on-site.
Making the Sequence the Default
A containment cart that's easy to set up correctly is only half the equation. The other half is a sequence that doesn't leave room for the setup to vary by crew, schedule pressure, or how familiar a job feels. Facilities that get this right treat the order of operations as part of the equipment, not a separate step someone has to remember.
If your team can't say with confidence that every crew follows the same sequence on every job, that's worth checking before the next audit or incident finds the gap. HEPACART's team works with facilities and construction crews to build a repeatable setup process around equipment like HEPACART Classic. Get in touch to walk through what a standardized sequence would look like for the spaces you're responsible for.

Share this
